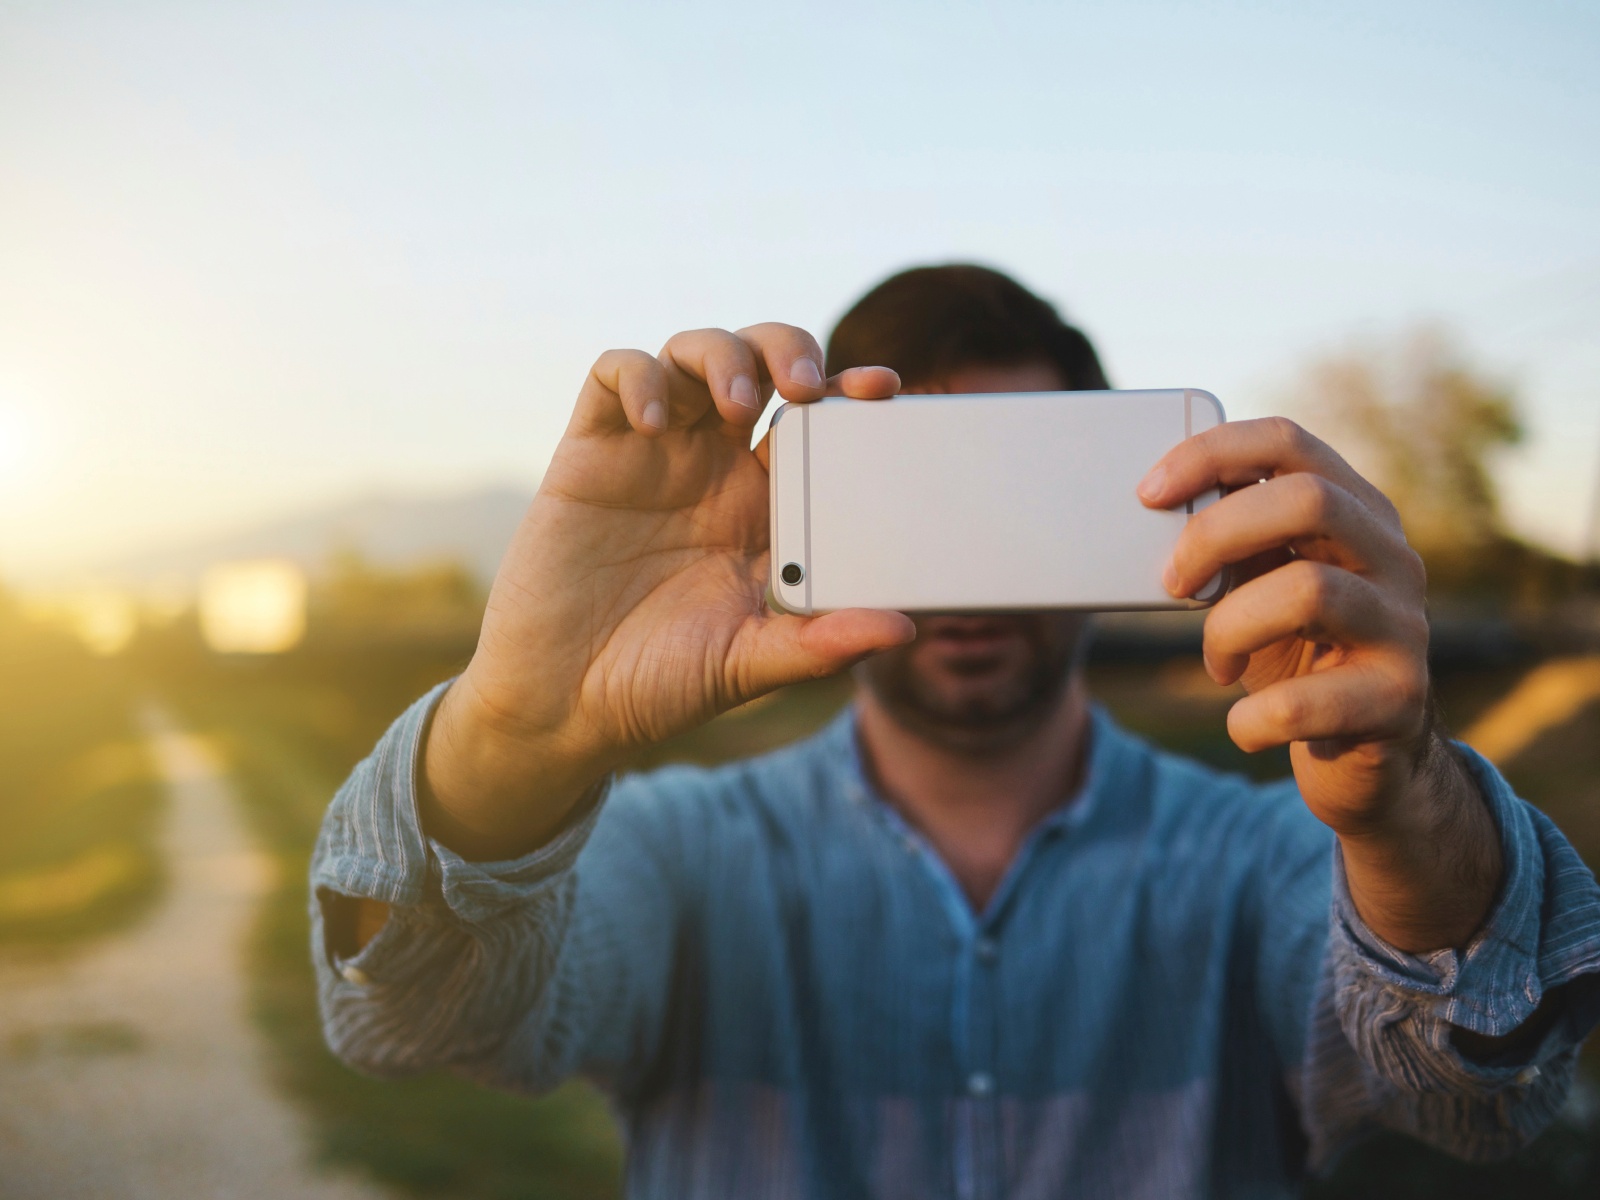
The power to nail your brand’s visual advertising might be sheathed in your pocket right now.
iPhone cameras (and smartphone cameras in general) have evolved far beyond the rinky-dink cameras of their predecessors. Current technology allows you to shoot stellar photos on your iPhone that rival the quality of more expensive DSLR and mirrorless cameras – all executed by a tool that you carry around every day.
Overall, iPhone cameras offer a nimble, inexpensive way to produce beautiful marketing photography, making marketing managers like me very, very happy.
There’s just one thing: With great power comes great responsibility.
When publishing visual assets on behalf of a brand, there are more layers to consider than shooting high quality photos.
Here are the three central elements of nailing your visual marketing using only your iPhone (no darkroom required).
Take Better Pictures with Your iPhone
A tool is useless if you don’t know how to use it properly. Here are a few tips to improve your photos when shooting with your iPhone.
Use the rule of thirds.
If you have taken any sort of art class in your life, you are familiar with the rule of thirds. If not, it’s time to get familiar.
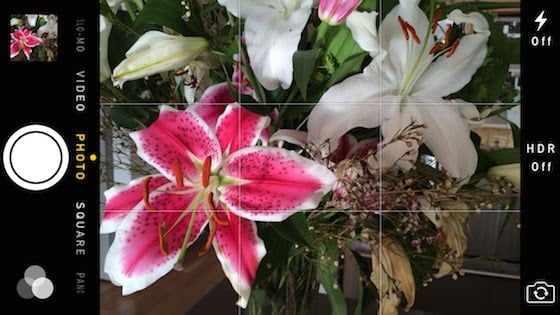
First, turn on the grid function on your iPhone (Settings -> Photos & Camera -> Grid). The guidelines that appear will allow you to better compose your shot, helping you achieve balance, symmetry, and focus. As a general rule, try to line up the most visually interesting elements of your image along the lines or at the points where they intersect.
Zoom with your feet, not your phone.
The iPhone’s zoom function is powerful, but it will quickly deflate your image quality. Whenever possible, physically move closer to your subject instead of using the built-in zoom.
Tap on your subject to focus on it.
Do your photos often come out blurry? When in your iPhone’s camera viewfinder, tap on the subject you are shooting and a box will appear like in the photo here.
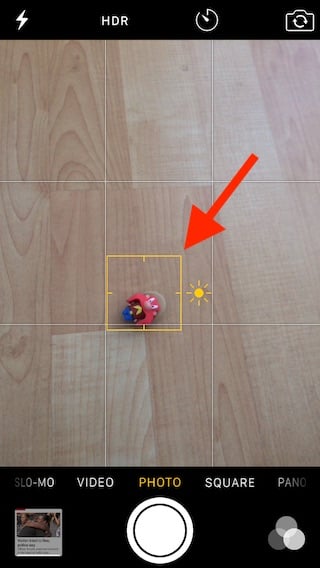
This action sets both the focus for your shot as well as the exposure; to lock in this focal point, hold down on the screen where you’ve tapped until you see AE/AF lock appear on the screen.
Bonus tip: Drag your finger up and down on the sun icon to adjust the brightness of your image. Yeah, your iPhone can do that. You’re welcome.
Don’t use the flash.
Unless, of course, your goal is to make your photos look as heinously bad as possible. Just trust me on this one.
Use a third party app.
The native camera app on the iPhone is pretty great, but it has its limits. Try shooting with some popular third party camera applications to gain greater control over your iPhone’s camera, including exposure, white balance, depth of field, and more.
I’ve included few of my personal favorites below, but there’s a sea of them out there that can give you more manual access to the iPhone’s camera at little to no cost.
Process Your Photos with iPhone Photography Apps
It takes a special kind of brilliance to take a spotless digital photo without any editing. For everyone else, there’s post-production image processing (a fancy way to say editing).
Thankfully, there are a ton of iPhone photography apps that can manipulate, sharpen, brighten, color, stylize, and transform your images in almost any way imaginable, without leaving the comfort of your phone.
Here are a few that won some coveted real estate on my own iPhone.

This app boasts almost unbelievable functionality for an iPhone photography app, and is a steal for only $2.99. Hipstamatic unlocks the ability to adjust the iPhone camera’s white balance, shutter speed, ISO, focus and exposure. Not to mention, there are a number of “films” and “lenses” embedded in the app, which offer a level of stylization no other app can match.
The feature that captured my heart: Fully adjustable manual focus that mimics f-stop control in expensive DSLR lenses.

VSCO is an amateur iPhone photographer favorite. Its simple interface offers a streamlined user experience for both taking and subsequently editing photos. VSCO has all of the photo editing tools you would expect from such a popular app, plus a number of filters (called “presets”) that give Instagram a run for its money.
The feature that captured my heart: By tapping on the screen with two fingers, VSCO Cam allows you to tap and drag where your iPhone’s camera will calculate exposure and focus, independent of one another.

This app has the steepest learning curve, but is a must for any serious iPhone photographer. On top of a number of stellar filters, SnapSeed also offers a number of unique editing features, like image transformation, tuning, and brushing, which are rare for a mobile app. And, as you’re manipulating your beautiful photo, SnapSeed displays a dynamic histogram on-screen at all times. Talk about awesome.
(Psst! Before using SnapSeed, there used to be something displayed on the screen in this picture.)
The feature that captured my heart: Unlike almost all other iPhone photography apps, SnapSeed allows you to spot edit your photos, as opposed to having to make blanket adjustments to the entire image.
Create a story (while staying visually consistent)
Your visual advertising should both tell a consistent story about your brand, and be tailored for your audience on each individual channel.
A few tips as you start populating your channels with your upgraded iPhone marketing photography:
Stay visually consistent.
Choose a color palette of about three colors that roughly falls within your brand’s creative guidelines. Keep these in mind when shooting and editing your photos. If you don’t quite have the photography know-how to adjust color tones in your images, try applying the same filter or preset to each of your photos before publishing.
Hint: This is especially important on social media channels, where images are often displayed side-by-side. Here’s a glimpse at what our Instagram page looks like with this principle applied:

Tell a story that speaks to your audience.
I love to tell stories – stories of my triumphs, my failures, and my misadventures – and I choose to believe people enjoy hearing about them.
However, the way I tell these stories changes depending on my audience (starting to ring any bells?) What is a G-Rated tale when told to my mother will suddenly become an R-Rated rant when unleashed on my barber.
Know which channel you are publishing on, and know who your audience is on that channel. The rest will fall into place.
Don’t be afraid to break the rules.
You now know the rules of acing your brand’s visual marketing by using your iPhone. And, of course, now that you know the rules, you also have the power to break them. And break them you must.
Get out there and start experimenting with your photography; it is the only way to find your brand’s visual identity. With your tool always nested in your pocket, there’s nothing holding you back from taking stellar photos.
Have any questions about what I just covered (or about photography in general, iPhones, the meaning of life)? Let’s talk: Drop us a line on Twitter @QuattroPhilly.